Setup environment for tutorials
In order to run the tutorials, either install Shyft using any available method for your platform, pip, conda, or build Shyft from sources.
If you have a working container environment, podman or docker, these can be used to get a quick start for working with Shyft.
Note
A ready made container image with Shyft, is available at container registry https://gitlab.com/shyft-os/shyft/container_registry
Container based setup
First, ensure you have the latest sdk image, of available flavors
If using vscode, create a dev container setup with this image, a similar setup template directory is available in https://gitlab.com/shyft-os/shyft/build_support/devcontainer, using the development container above.
In vscode terminal:
cd /workspaces
# download shyft-data package, currently v.1.4 an unpack it.
curl -LO - https://gitlab.com/shyft-os/shyft/-/package_files/164915673/download | tar -xzf -
git clone https://gitlab.com/shyft-os/shyft-doc.git
cd /usr/local/lib64
ln -s /workspaces/shyft-data shyft-data
cd /workspaces
pip install ipywidgets
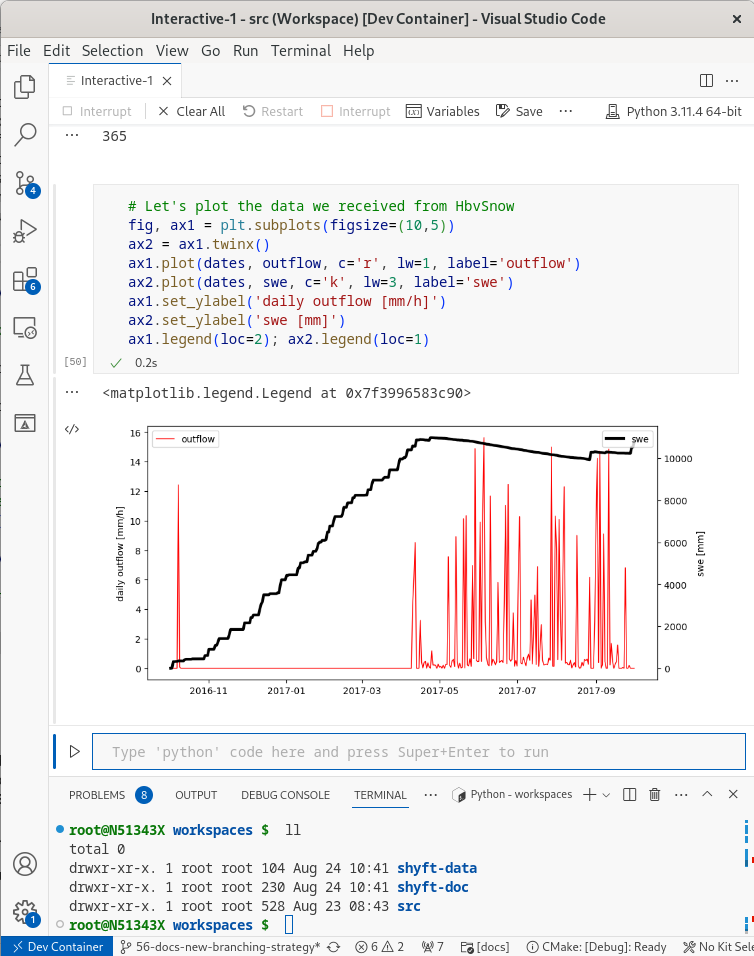
in vscode: Ctrl+Shift+P and select: Jupyter Create Interactive window
That’s it!
Example of working in interactive window:
Info about packages
Note
Shyft Python packages are wrapped around a C++ library. In contrast to Python, C++ allows function overloading which leads to some confusion in some IDEs like PyCharm and to doc strings unfamiliar to pure Python developers i.e. full C++ call signatures.
The code in shyft packages is designed to make use of standard help functionality in Python. You are able to access help functionality using tab completion or help(). The “?” or “??” standards in IPython work, but seem at times to be limited with respect to some of the doc strings. Therefore, we encourage you to please use help.
If you use help(shyft_object) and get something that is looks a bit overwhelming or unfamiliar, just realize that the methods are generally showing how to call a method and what it returns. If you see (object)arg1 or (object)self as a first argument to a method, that simply means the class itself is the first argument.
Example:
$ python
Python 3.8.8 (default, Feb 24 2021, 15:54:32) [...]
Type "help", "copyright", "credits" or "license" for more information.
>>>import shyft.time_series
>>>help(shyft.time_series.Calendar)

[...]

|  Static methods defined here:
|
|  __init__(...)
|      __init__( (Calendar)arg1) -> None
|
|      __init__( (Calendar)arg1, (time)tz_offset) -> None :
|          creates a calendar with constant tz-offset
|
|          Args:
|              tz_offset (time): specifies utc offset, time(3600) gives UTC+01 zone
|
|
|      __init__( (Calendar)arg1, (int)tz_offset) -> None :
|          creates a calendar with constant tz-offset
|
|          Args:
|              tz_offset (int): seconds utc offset, 3600 gives UTC+01 zone
|
|
|      __init__( (Calendar)arg1, (str)olson_tz_id) -> None :
|          create a Calendar from Olson timezone id, eg. 'Europe/Oslo'
|
|          Args:
|              olson_tz_id (str): Olson time-zone id, e.g. 'Europe/Oslo'
[...]
What this means is that the class Calendar may be instantiated as either:
Calendar(), returning an UTC CalendarCalendar(200), indicating a fixed offset of 200 seconds from UTCCalendar('Europe/Oslo')where the calendar will be ‘tied’ to the “Europe/Oslo” timezone.